As we are entering into the second main trekking season in Nepal, I decided it was time to share this post. The words jump back to November 2018 and form part-three of a four-part series on my travel and adventure to this wonderful part of Southern Asia.

This particular post covers:
– Getting from Kathmandu to the Annapurna region (the other main trekking hub).
– A 10-day trek to part of the Annapurna region.
– A few tips on choosing a guide
– Epic photos of not one, but two, sunrise mountain views!
You can view part one and part two here.
Part one offers info on Southern Asia, Nepal, pre-adventure prep, and choosing an area to hike, and part two offers info on arrival to the country, where to stay, and arranging a first short hike.
Without further delay, let’s go back to November 2018…..
Travelling from KATHMANDU to POKHARA.
After a few days in Kathmandu, I booked a (short) flight to Pokhara. There are other options to travel to what is the other main hiking hub in the country, but I decided I would fly to the region and take a bus back to Kathmandu when I was ready to return.
Skyscanner proved the best tool for booking a last-minute flight. I think it was $80 for a 45-minute flight. Bearing in mind a bus can range from $5-$40 for a 6-hour ride, I didn’t think this was bad value.
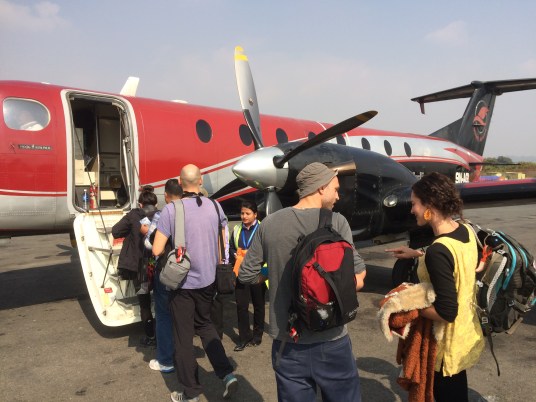
One thing to bear in mind with Nepal is the weather. Especially at altitude. Low-level cloud had caused a lot of flight delays and, when I arrived at the domestic terminal, I was greeted with a packed departure lounge and a morning of delays!


Still, I was one of the lucky ones. I only had to wait 4 hours to take my flight. I spoke to people at the airport who had been there overnight.
Once the weather cleared, the flight was great. A mini-adventure within an adventure. I’m not sure how old the plane was though. And bear-in-mind Nepal has one of the worlds worst safety records for flights…..
ORGANISING THE TREK
For this trek, I decided to use a guide. This is a subjective thing to do and there are many ways to approach it.
The first question is ‘do I need a guide?’.
To be honest, for some of the well-trodden rials, the answer is no. But, this all depends on how experienced you are, how organised you can be, and how much hassle you want/don’t want.
A (good) guide is not only a guide, but an insight into the country, all-around organiser, a point of contact in case something goes wrong, and company.
This was my first time in Nepal and, because I wasn’t planning on doing any of the well-known routes in the region (Annapurna base camp / Annapurna circuit) I decided it was worth the cost.
I’d emphasise that it’s worth meeting your guide upfront if you can, trusting your instinct, and being clear on the route you want to take.
I’ve included a link to a guide I found online on how you could approach this. It’s worth a few moments of your time (as is a look at the rest of the site).
CHOOSING A GUIDE
I met with three different guides to discuss the trek I had in mind.
The first was from a recommendation from another traveller I met whilst in Kathmandu.
She had returned from a 3-week trek and couldn’t rate her guide enough. I met with him and, whilst he seemed a knowledgable guide and a nice person, all he talked about was receiving a tip. In my mind, for a first meeting, it put me off.
The second guide I met was through a recommendation (link here). I met with the company owner and we discussed options and he agreed he could support the trek I wanted to do. Once on the ground in Pokhara, he introduced me to one of his guides – who told me he didn’t want to do the route I wanted. This ruled him out.
The third guide was the one I ended up using. His name was Balaram Adhikari. He was the brother of the hotel owner I was staying at. He helped organise equipment and paperwork and seemed supportive with my idea of where I wanted to trek.
I was so eager to just get moving I went with it. With hindsight, I should have ironed out a few creases beforehand as these surfaced midway through the hike, but you live and learn.
Organised like this, an English speaking guide will cost between $20 and $30 a day. A porter (someone to carry your bags who doesn’t speak English) will be less. To make sure your guide is legitimate, ask to see his license card.
I’d emphasis again to be clear with your guide with what you are hoping to do / where you hope to go / who is responsible for what on the trek.

Also, worth bearing in mind, for any of the treks you need a permit of Trekkers information Management system (TIMS) card. You can buy these yourself (if trekking on your own), or your guide can help arrange.
There are 2 different types of TIMS cards – depending on if you are trekking solo or guided. They are available are the tourist info centers in Kathmandu or Pokhara. Most travel agencies can also arrange these for a fee.
MARDI HIMAL BASE CAMP – Part one of the trek.
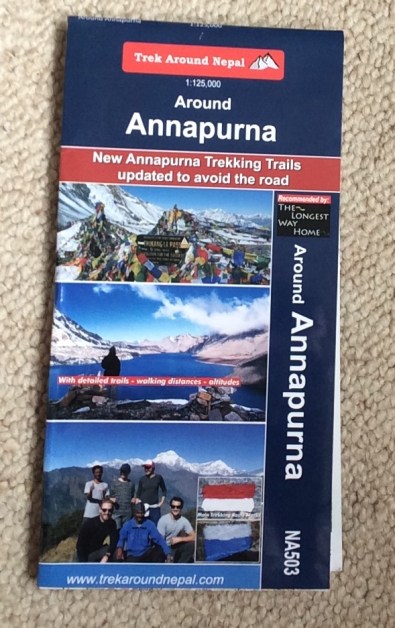
I decided to trek in the Annapurna region. The most famous treks here are the ‘circuit’, and ‘Annapurna Base Camp’.
I steered away from the more famous treks and set my heart on the Mardi Himal trek. I knew it was about a week-long, went up to 4500m, and was hard enough to be a challenge.
Sitting with my guide we mapped out a rough route and itinerary that went up to the base camp, back down, dropped into another valley, and finally worked its way up to another viewpoint before looping back to the start point.
I opted to carry all my equipment, knowing that we would stay in tea houses up the mountainside. Another advantage of taking a guide is that he can call ahead and check availability. Not normally a problem on the quiet routes, but on the busy treks, I hear this can be a problem.
Saying that, the worst case is you will end up sleeping on the floor for a night, crammed in with everyone else. At least you’ll be warm…
The trek begins with a jeep ride to a set starting point and takes in forests for the first few days. I must admit, it was strange being with someone I didn’t know, knowing we were both committed for the next 10 days!

Along the route, we picked up a few other independent travellers and formed a random group of six – me and my guide, a girl from China and her Porter, a man from Turkey (and his giant rucksack) carried by a porter.

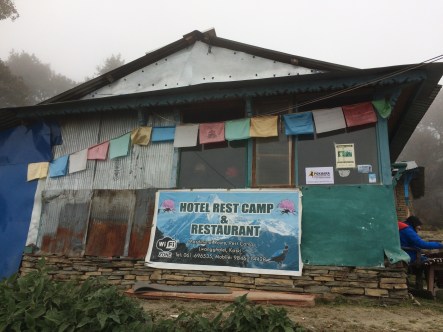
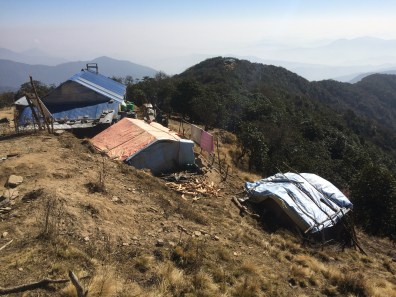
The route works its way up along a ridge stopping at various tea houses. They are all basic and offer a cheap nights accommodation and food.
I don’t think I spent more than £5-£10 a night. Costs go up if you start to drink the beers! Food is the traditional Dal Bhat – you will learn to love it 🙂
You can buy bottled water and snacks on the route. I opted to purify my water. Chlorine tablets don’t taste great, but you can mask the taste with powdered sweetener, and it helps avoid the use of plastic bottles.

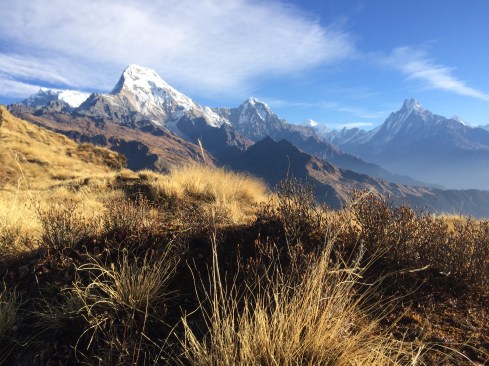
What I enjoyed on this route was the changing landscape.
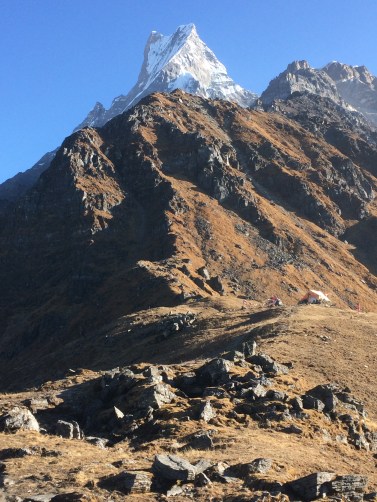
Whilst the start was a dusty jeep track at a low altitude, it soon moved up through the subtropical zone, into the forest, and eventually became a barren but beautiful rocky landscape.
This was surrounded by some of the worlds highest peaks (many above 7000 meters) as we neared the base camp – the highest point you can get to without technical climbing (at 4500 meters).
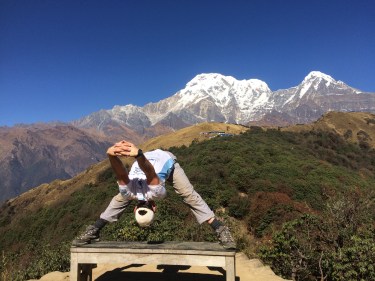


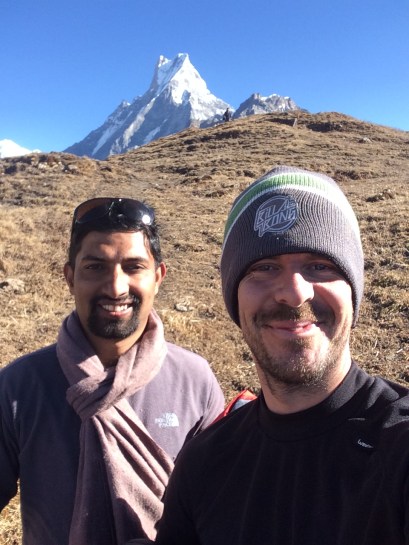
For me, it’s all about the early morning push to the summit, stumbling through the dark, picking your way up a rocky mountainside to feel the warmth of the sun on your face as it rises.


There is nothing like seeing the sunlight bathing the side of 7000m mountain peaks in a warm orange glow. As I write this, I have chills running down my spine! If you ever get the chance to experience this, I’d wholeheartedly recommend it.
MULDAI VIEWPOINT – Part two of the trek.
After returning from the base camp, the second part of the trek dropped into a neighboring valley, worked its way up the other side, and looped round to one of the main hiking intersections.
Most who cover this area end up at Poon Hill for the sunrise, but I had other ideas.
A few days previously I’d met two American hikers who were doing a similar loop to me, only in reverse. They told me about a viewpoint at Muldai. They were the second group of people I’d met who’d recommended this to me.
My guide, however, was reluctant to explore and, because he has not been to this area before, tried to ignore my idea. He wanted to stick to this path he knew and had no wish to explore a lesser-known area.
This proved frustrating as we’d agreed on this – but only in principle. Things broke down between us for a few hours. After some open and honest conversation in which we both cleared the air, we agreed on a compromise.
I am pleased to say what was an awkward conversation did clear the way, and the next five days were incredible. I only mention it here to emphasise being clear with your guide upfront.
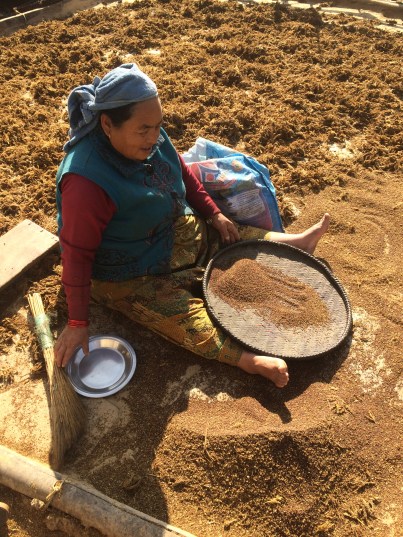
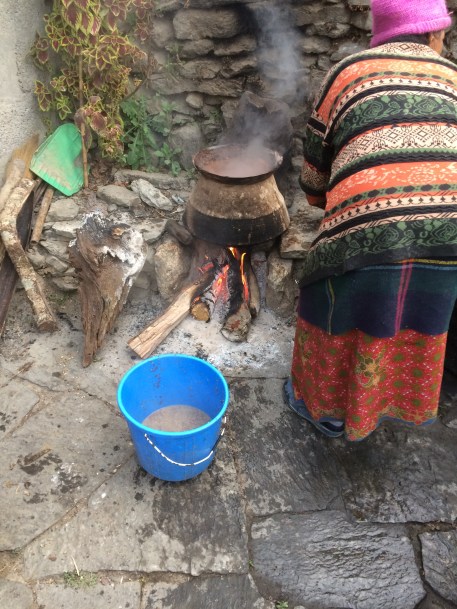
What I enjoyed about this part of the trek were the lower alpine region and local villages. Or perhaps it was also my first shower in five days!


The next few days seemed less about a hard slog up a mountainside, and more about a relaxed look into village life (before a long walk back up the mountainside again!).


From here it was an isolated hike to Dubato, and then to the viewpoint at Muldai.

It was nothing short of incredible!
Perhaps not as dramatic as the views from Mardi Himel base camp, but the perspective of where we were, and what we were surrounded by, was unparalleled to anything I’d seen before.
On one side was the Annapurna, to the other the ranges of Dhaulagiri, and to the other the low lands of the country. I’d return tomorrow for this vista!


The final few days led us down, through more villages, and back to the main road to arrange a lift back to our starting point at Pokhara.

By this point, I’d developed a taste for the local drink – Raksi – otherwise known as ‘mountain blanket’. It’s cheaper than beer, tastes a bit like Saka, is made from millet, and seems to keep everyone smiling.


All in all this ten-day hike was great.
It was a real mix consisting of an uphill slog rewarded with sunrise mountain views; lowland lush forest hikes; a look at local village life; and a chance to meet a mix of international travellers, guides, and porters.
Despite the issue I had with my guide it was put behind us and we became friends. I’d recommend him, and also the region I explored.
Bearing in mind some of the routes are heavily trafficked with tourists – so you perhaps don’t need a guide – but some of the areas are not (and these are the better routes in my mind).
Signs and maps are OK, but not perfect, and it could be easy to lose a footing and get into trouble.
The choice is personal but, either way, it’s an incredible area to explore and easy (ish) to arrange once on the ground.
There are, of course, many areas to trek in Nepal. It truly is an incredible place to spend some time.
Next post – exploring the cultural side of Nepal.

Beautiful and thanks for sharing stunning photos as well.
LikeLike
Thank you 😊
LikeLike